
Agency Questionnaires
Purpose of this document
The Agency Activity Review functionality provides users with the ability to create Agency Questionnaires and record data obtained from these Questionnaires. Some examples would be Qualification assessments or Monthly Statistics Surveys. In addition the information can be used to export to external monitoring agencies such as the State of NY HPNAP if necessary.
Note: None of the data entered here automatically updates any other Agency fields in Ceres.
Ceres Object releases 5.00.95, 5.03.20, 5.03.36, 5.03.43, 5.03.45, and 5.03.46 are required for the functionality described in this document.
Table of Contents
General Structure
To record the Agency Review data, the Questionnaire(s) must first be setup. Once a Questionnaire has been setup it is then used as the template to guide the food bank through the review process to insure that all required information is gathered and recorded. The setup of Questionnaires involves three steps:
- Setup of Questions.
- Setup of Questionnaire Header.
- Linking questions to the Questionnaire Header and defining the Answer Guide.
Setup of Questions
- Ceres Questions Setup may be accessed by selecting Departments à Agency & Receivables à Agency Relations à Setup à Questionnaire à Ceres Questions.

Questions can be used on one or more Questionnaires. If the same question is needed for multiple Questionnaires, it only needs to be setup once in Ceres Questions Setup, regardless if the answers may be different for different Questionnaires.
- The Edit – Ceres Question Page opens. A list of all questions currently defined will be displayed.
Note: The line on which your cursor is placed will determine what Code you see at the top left.

- Click Home à Manage à New to create a new question.

- Fill in the information as desired.
Example:

Code: Enter a unique code to identify the question. Use something short by descriptive such as Adults, Children, etc.
Report Text: Enter the question that is to be asked of the agency in the form of a question to aid the user when performing the review.
Column Heading: This is a short description that will identify the information being requested when recording answers during the review.
Answer Type has the following options:
Decimal – Allows for the entry of a number such as a quantity or dollar amount.
Multiple Choice – Allows you to setup multiple answers for the user to select from.
Text – Allows alpha numeric data up to 20 characters.
Note – Allows alpha numeric data up to 250 characters (CERES5.00.95).
Type: Choose from single or multiple. If only one answer is allowed for the question choose single, otherwise choose multiple to allow for more than one answer to be selected for the question. This can also be used to record a date into multiple segments for reporting purposes such as the Submission Date for HPNAP reporting.
Note: Ceres 5.03.20, 5.03.36, 5.03.43, 5.03.45, and 5.03.46 resolved several issues with multiple choice Questions and Answers not working as designed. With these Ceres releases applied the following rules apply.
- Answer Type = Multiple Choice with Type = Multiple indicates that multiple Answer Options may be selected.
- Answer Type = Text with Type = Multiple indicates that only one Answer Option may be selected.
- Type = Multiple only applies to Answer Type = Multiple Choice or Answer Type = Text. If you try to set Type = Multiple on Answer Type Decimal or Note an error will be generated:

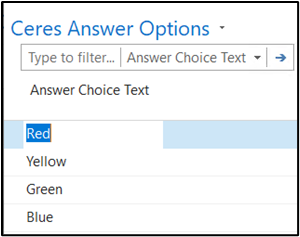
- When Type = Multiple you may enter the valid answers by clicking on “Answer Options” to define the multiple-choice answers for this question.

- Repeat steps 3 and 4 as necessary to define as many questions as needed.
Note: Ceres Questions cannot be changed or deleted if on an Active survey.
Setup of Questionnaire
- Questionnaire setup may be accessed by selecting Departments à Agency & Receivables à Agency Relations à Setup à Questionnaire à Ceres Questionnaire Setup.

- The Edit – Ceres Questionnaire Setup window will open. A list of all Questionnaires currently defined will be displayed. To create a new Questionnaire, choose Home à Manage à New.

- A new line will be created for you to enter the information pertaining to the Questionnaire.

Code: Enter a unique code to identify the questionnaire. Use something descriptive like HPNAP, TEFAP, etc. to easily identify the questionnaire.
Description: Enter a longer description that fully identifies the questionnaire.
Blocked: Check this box to prevent entry of reviews against this questionnaire. This is useful, if the questionnaire was to be used to collect information for a period of time and you no longer wish to have users enter additional data into this particular questionnaire.
Deny AE Ordering: Check this box if failure to complete the Survey should deny the Agency’s ability to place online orders.
AE Survey Frequency: How often the survey needs to be completed.
AE Survey Status: Whether the Survey is In Planning, Active or Closed.
AE Survey Title: An easily recognizable name for the survey.
AE Survey Start Date: The Date to be specified as the start of the survey.
AE Survey Expiration Date: The Date the survey is to end.
Created By: A system controlled field that records User ID for the user that created the questionnaire.
Last Modified By: A system controlled field that records User ID for the user that last modified the questionnaire.
Last Modified Date: A system controlled field that records date the questionnaire was last modified.
AE Survey Grace Period: A defined number of days or weeks that the agency has to complete the survey after the Frequency Date has passed.
Here is an example of a survey we have created a new Questionnaire called HPNAP.

This completes the setup of the Questionnaire Header. Next we will assign the questions required for this Questionnaire and define the allowed answers.
- Next we will assign the questions required for this Questionnaire and define the allowed answers. To Define the Answer, click on (highlight) the Questionnaire you wish to work with and then click on Answers.

- If Answers have already been defined for this Questionnaire, they will be displayed for editing.
- To add a new answer click Home à Manage à New.

- Then use the Assist Button to select a question from the defined Question List first.
Note: The Field No. (if displayed) will not populate until you have saved/moved off the line) and the Questionnaire Code will default to the Code associated with the Questionnaire you selected on the previous window.

- Select the Question that is to be asked of the Agency. Here we’ve selected the CHILDREN question.
- You will then need to fill in the report text and Column Heading.
Note: For HPNAP reporting, select from the available choices for the HPNAP Export Column. If this is not for HPNAP reporting, leave this column blank. Fill in an AE Survey Decimal Min Value and Max Value where applicable.

- Repeat steps 9 and 10 to add more answers to the Questionnaire. Once you have completed the answer portion of the Questionnaire click OK.

Setup of Questionnaire Groups
Questionnaire Group Codes provide the ability to associate a Questionnaire with one or more Agencies. Any Questionnaire not represented by a Questionnaire Group is said to be applicable to any Agency.
- Questionnaire Groups may be accessed by selecting Departments à Agencies & Receivables à Agency Relations à Setup à Questionnaire à Ceres Questionnaire Groups.

- Any existing Questionnaire Groups will be displayed. If none, the window will be empty:
- Click the “New” icon to create a new Questionnaire Group.
- Fill in the information as necessary.

Code: Enter a unique code to identify the Questionnaire Group.
Description: Enter a description of you choosing.
Questionnaire Code: Select an existing Ceres Questionnaire.
- Lastly, for each Agency to which the Ceres Questionnaire applies, specify the Ceres Questionnaire Group Code on the Information FastTab of the Agency Card.

Entry of Agency Responses
Entry from the Task Menu
Entry from the Task Menu allows the entry of responses from multiple Agencies at once.
- The actual data entry of the Agency Review can be accomplished from either the Agency Card or from the menu. To access from the menu go to Departments à Agency & Receivables àAgency Relations à Tasks à Agency Activity Review.

- Select the Questionnaire you wish to record activity for. You can enter Code if you know it or use the Assist Button to view a list of the defined Questionnaires in Ceres.
Note: If you wish to display previously entered results, you can set an Entry Date Filter and/or Agency No./No’s filter before viewing the Matrix:

- Click on Show Matrix.
- Select Manage àNew to add a new review or just begin entering information on the first blank line in the window.

- Enter the information as required by the Questionnaire. The information required here is dependent upon the setup of the Questionnaire; however, all Questionnaires will require at least the Agency No., Service Date and Entry Date. Decimal answers will allow the entry of a number while multiple choice answers will be presented as a check box that the user can select the appropriate answer.

Access from the Agency Card
Entry from the Task Menu allows the entry of responses for one specific Agency.
- To access from the agency card, go to Departments à Agencies & Receivables à Agency Relations à Agencies.

- Select the Agency you wish to review by right-clicking on it and choosing edit (or by double clicking on the Agency Number).

- Select Navigate à Agency à Agency Activity Review.

- Fill in the Questionnaire you wish to enter or view. Then click on Process à Show Matrix.

- All previous responses for this Questionnaire will be displayed for review based on date range for the show Matrix option.
Note: If there are no responses within the current time frame, you may need to set an Entry Date Filter for a prior date range to see responses.

- To enter a new review, select Manage à New.
- Enter the information required by Questionnaire. The information required here is dependent upon the setup of the Questionnaire however all Questionnaires will require at least the Agency No., Service Date and Entry Date. Decimal answers will allow the entry of a number while multiple choice answers will be presented as a check box that the user can select the appropriate answer.
Was this article helpful?
That’s Great!
Thank you for your feedback
Sorry! We couldn't be helpful
Thank you for your feedback
Feedback sent
We appreciate your effort and will try to fix the article